WPF Study notes(3):Painting
04 Apr 2012This article is about painting and animation in WPF.
Painting:
1.Line
Demo:
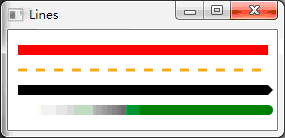
<Window xmlns="http://schemas.microsoft.com/winfx/2006/xaml/presentation"
        xmlns:x="http://schemas.microsoft.com/winfx/2006/xaml"
        x:Class="Lazy_Setter_Trigger.MainWindow"
        Title="Lines" Width="292" Height="275">
    <Grid>
        <Line X1="10" Y1="20" X2="260" Y2="20" Stroke="Red" StrokeThickness="10"/>
        <Line X1="10" Y1="40" X2="260" Y2="40" Stroke="Orange" StrokeDashArray="3" StrokeThickness="3"/>
        <Line X1="10" Y1="60" X2="260" Y2="60" Stroke="Black" StrokeEndLineCap="Triangle" StrokeThickness="10"/>
        <Line X1="10" Y1="80" X2="260" Y2="80" StrokeEndLineCap="Round" StrokeThickness="10">
            <Line.Stroke>
                <LinearGradientBrush EndPoint="0,0.5" StartPoint="0.5,0.5">
                    <GradientStop Color="Green"/>
                    <GradientStop Offset="1"/>
                </LinearGradientBrush>
            </Line.Stroke>
        </Line>
    </Grid>
</Window>
2.Rectangle
Demo:
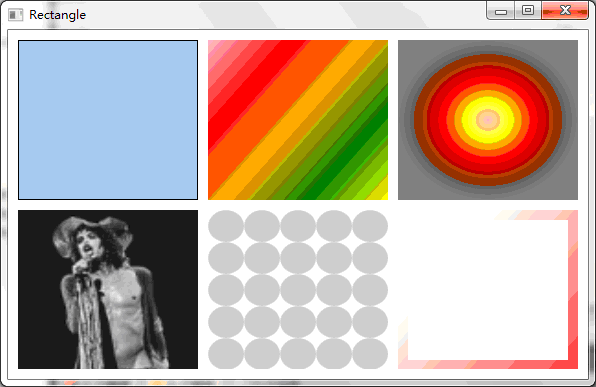
<Window xmlns="http://schemas.microsoft.com/winfx/2006/xaml/presentation"
        xmlns:x="http://schemas.microsoft.com/winfx/2006/xaml"
        x:Class="Lazy_Setter_Trigger.MainWindow"
        Title="Rectangle" Width="600" Height="400">
    <Grid Margin="10">
        <Grid.RowDefinitions>
            <RowDefinition Height="160"/>
            <RowDefinition Height="10"/>
            <RowDefinition Height="160"/>
        </Grid.RowDefinitions>
        <Grid.ColumnDefinitions>
            <ColumnDefinition Width="180"/>
            <ColumnDefinition Width="10"/>
            <ColumnDefinition Width="180"/>
            <ColumnDefinition Width="10"/>
            <ColumnDefinition Width="180"/>
        </Grid.ColumnDefinitions>
        <!--实心填充-->
        <Rectangle Grid.Column="0" Grid.Row="0" Stroke="Black" Fill="LightBlue"/>
        <!--线性渐变-->
        <Rectangle Grid.Column="2" Grid.Row="0">
            <Rectangle.Fill>
                <LinearGradientBrush StartPoint="0,0" EndPoint="1,1">
                    <GradientStop Color="Pink" Offset="0"/>
                    <GradientStop Color="red" Offset="0.25"/>
                    <GradientStop Color="Orange" Offset="0.5"/>
                    <GradientStop Color="Green" Offset="0.75"/>
                    <GradientStop Color="Yellow" Offset="1"/>
                </LinearGradientBrush>
            </Rectangle.Fill>
        </Rectangle>
        <!--径向渐变-->
        <Rectangle Grid.Column="4" Grid.Row="0">
            <Rectangle.Fill>
                <RadialGradientBrush>
                    <GradientStop Color="Pink" Offset="0"/>
                    <GradientStop Color="Yellow" Offset="0.25"/>
                    <GradientStop Color="Red" Offset="0.5"/>
                    <GradientStop Color="Brown" Offset="0.75"/>
                    <GradientStop Color="Gray" Offset="1"/>
                </RadialGradientBrush>
            </Rectangle.Fill>
        </Rectangle>
        <!--图片填充-->
        <Rectangle Grid.Column="0" Grid.Row="2">
            <Rectangle.Fill>
                <ImageBrush ImageSource="Resources/img/aero.gif"/>
            </Rectangle.Fill>
        </Rectangle>
        <!--矢量图填充-->
        <Rectangle Grid.Column="2" Grid.Row="2">
            <Rectangle.Fill>
                <DrawingBrush Viewport="0,0,0.2,0.2" TileMode="Tile">
                    <DrawingBrush.Drawing>
                        <GeometryDrawing Brush="LightGray">
                            <GeometryDrawing.Geometry>
                                <EllipseGeometry RadiusX="10" RadiusY="10"/>
                            </GeometryDrawing.Geometry>
                        </GeometryDrawing>
                    </DrawingBrush.Drawing>
                </DrawingBrush>
            </Rectangle.Fill>
        </Rectangle>
        <!--无填充,用线性渐变填充边线-->
        <Rectangle Grid.Column="4" Grid.Row="2" StrokeThickness="10">
            <Rectangle.Stroke>
                <LinearGradientBrush StartPoint="0,0" EndPoint="1,1">
                    <GradientStop Color="White" Offset="0.3"/>
                    <GradientStop Color="#ff4040" Offset="1"/>
                </LinearGradientBrush>
            </Rectangle.Stroke>
        </Rectangle>
    </Grid>
</Window>
3.Circle
Demo:
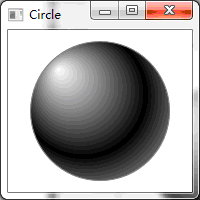
<Window xmlns="http://schemas.microsoft.com/winfx/2006/xaml/presentation"
        xmlns:x="http://schemas.microsoft.com/winfx/2006/xaml"
        x:Class="Lazy_Setter_Trigger.MainWindow"
        Title="Circle" Width="200" Height="200">
    <Grid>
        <Ellipse Stroke="Gray" Width="140" Height="140" Cursor="Hand" ToolTip="A Ball">
            <Ellipse.Fill>
                <RadialGradientBrush GradientOrigin="0.2,0.8" RadiusX="0.75" RadiusY="0.75">
                    <RadialGradientBrush.RelativeTransform>
                        <TransformGroup>
                            <RotateTransform Angle="90" CenterX="0.5" CenterY="0.5"/>
                            <TranslateTransform/>
                        </TransformGroup>
                    </RadialGradientBrush.RelativeTransform>
                    <GradientStop Color="#fff" Offset="0"/>
                    <GradientStop Color="Black" Offset="0.6"/>
                    <GradientStop Color="#ccc" Offset="1"/>
                </RadialGradientBrush>
            </Ellipse.Fill>
        </Ellipse>
    </Grid>
</Window>
4.Path
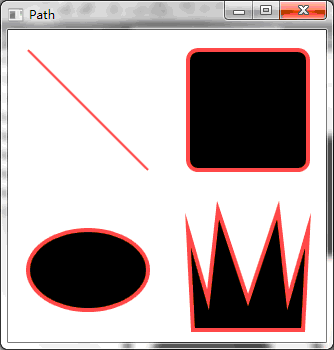
<Window xmlns="http://schemas.microsoft.com/winfx/2006/xaml/presentation"
        xmlns:x="http://schemas.microsoft.com/winfx/2006/xaml"
        x:Class="Lazy_Setter_Trigger.MainWindow"
        Title="Path" Width="350" Height="340">
    <Grid>
        <Grid.ColumnDefinitions>
            <ColumnDefinition Width="160"/>
            <ColumnDefinition Width="160"/>
        </Grid.ColumnDefinitions>
        <Grid.RowDefinitions>
            <RowDefinition Height="160"/>
            <RowDefinition Height="160"/>
        </Grid.RowDefinitions>
        <!--直线-->
        <Path Stroke="#ff4040" StrokeThickness="2" Grid.Column="0" Grid.Row="0">
            <Path.Data>
                <LineGeometry StartPoint="20,20" EndPoint="140,140"/>
            </Path.Data>
        </Path>
        <!--矩形路径-->
        <Path Stroke="#ff4040" Fill="#000" Grid.Column="1" Grid.Row="0" StrokeThickness="4">
            <Path.Data>
                <RectangleGeometry Rect="20,20,120,120" RadiusX="10" RadiusY="10"/>
            </Path.Data>
        </Path>
        <!--椭圆路径-->
        <Path Stroke="#FF4040" Fill="#000" Grid.Column="0" Grid.Row="1" StrokeThickness="4">
            <Path.Data>
                <EllipseGeometry Center="80,80" RadiusX="60" RadiusY="40"/>
            </Path.Data>
        </Path>
        <!--自定义路径-->
        <Path Stroke="#ff4040" Fill="#000" Grid.Column="1" Grid.Row="1" StrokeThickness="4">
            <Path.Data>
                <PathGeometry>
                    <PathGeometry.Figures>
                        <PathFigure StartPoint="25,140" IsClosed="True">
                            <PathFigure.Segments>
                                <LineSegment Point="20,40"/>
                                <LineSegment Point="40,110"/>
                                <LineSegment Point="50,20"/>
                                <LineSegment Point="80,110"/>
                                <LineSegment Point="110,20"/>
                                <LineSegment Point="120,110"/>
                                <LineSegment Point="140,40"/>
                                <LineSegment Point="135,140"/>
                            </PathFigure.Segments>
                        </PathFigure>
                    </PathGeometry.Figures>
                </PathGeometry>
            </Path.Data>
        </Path>
    </Grid>
</Window>
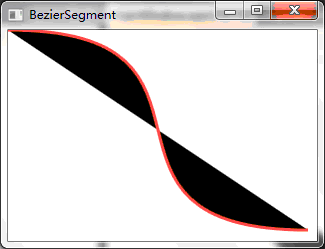
<Window xmlns="http://schemas.microsoft.com/winfx/2006/xaml/presentation"
        xmlns:x="http://schemas.microsoft.com/winfx/2006/xaml"
        x:Class="Lazy_Setter_Trigger.MainWindow"
        Title="BezierSegment" Width="350" Height="340">
    <Grid>
        <Path Stroke="#ff4040" Fill="#000" StrokeThickness="3">
            <Path.Data>
                <GeometryGroup>
                    <PathGeometry>
                        <PathFigure StartPoint="0,0">
                            <BezierSegment Point1="250,0" Point2="50,200" Point3="300,200"/>
                        </PathFigure>
                    </PathGeometry>
                </GeometryGroup>
            </Path.Data>
        </Path>
    </Grid>
</Window>
5.BitmapEffect
Demo:
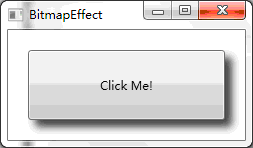
<Window xmlns="http://schemas.microsoft.com/winfx/2006/xaml/presentation"
        xmlns:x="http://schemas.microsoft.com/winfx/2006/xaml"
        x:Class="Lazy_Setter_Trigger.MainWindow"
        Title="BitmapEffect" Width="350" Height="340">
    <Grid>
        <Button Content="Click Me!" Margin="20">
            <Button.BitmapEffect>
                <DropShadowBitmapEffect Direction="-45" Opacity="0.75" ShadowDepth="10"/>
            </Button.BitmapEffect>
        </Button>
    </Grid>
</Window>
6.Render Transform
Demo:
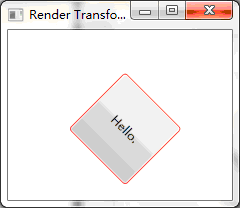
<Window xmlns="http://schemas.microsoft.com/winfx/2006/xaml/presentation"
        xmlns:x="http://schemas.microsoft.com/winfx/2006/xaml"
        x:Class="Lazy_Setter_Trigger.MainWindow"
        Title="Render Transform" Width="350" Height="340">
    <Grid>
        <Grid.ColumnDefinitions>
            <ColumnDefinition Width="Auto"/>
            <ColumnDefinition Width="*"/>
        </Grid.ColumnDefinitions>
        <Grid.RowDefinitions>
            <RowDefinition Height="Auto"/>
            <RowDefinition Height="*"/>
        </Grid.RowDefinitions>
        <Button Width="80" Height="80" BorderThickness="10" BorderBrush="#ff4040" HorizontalAlignment="Left" VerticalAlignment="Top" Content="Hello.">
            <Button.RenderTransform>
                <TransformGroup>
                    <RotateTransform CenterX="50" CenterY="60" Angle="45"/>
                    <TranslateTransform X="60" Y="60"/>
                    <!--按钮位置偏移量-->
                </TransformGroup>
            </Button.RenderTransform>
        </Button>
    </Grid>
</Window>
7.Layout Transform
Demo:
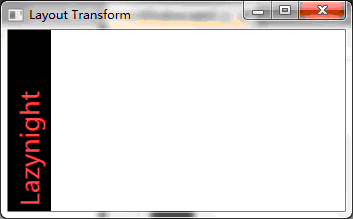
<Window xmlns="http://schemas.microsoft.com/winfx/2006/xaml/presentation"
        xmlns:x="http://schemas.microsoft.com/winfx/2006/xaml"
        x:Class="Lazy_Setter_Trigger.MainWindow"
        Title="Layout Transform" Width="350" Height="340">
    <Grid>
        <!--Layout-->
        <Grid.ColumnDefinitions>
            <ColumnDefinition Width="Auto"/>
            <ColumnDefinition Width="*"/>
        </Grid.ColumnDefinitions>
        <!--Content-->
        <Grid x:Name="titleBar" Background="#000">
            <TextBlock Text="Lazynight" FontSize="25" Padding="5" Foreground="#ff4040" HorizontalAlignment="Left" VerticalAlignment="Bottom">
                <TextBlock.LayoutTransform>
                    <RotateTransform Angle="-90"/>
                </TextBlock.LayoutTransform>
            </TextBlock>
        </Grid>
    </Grid>
</Window>
转载请注明:于哲的博客 » WPF Study notes(3):Painting